
During stay-at-home life this past month, I’ve been working on a large four-panel quilt. (The posts I’ve done about the little girls figuring things out and the stenciled leaves are all part of this same work.)
This has turned out to be a challenging project. (Meaning some days I just feel like it’s kicking my butt!) Yet, I can see it evolving, and I have faith that it is going where I hope. I just need to keep working through the various stages.

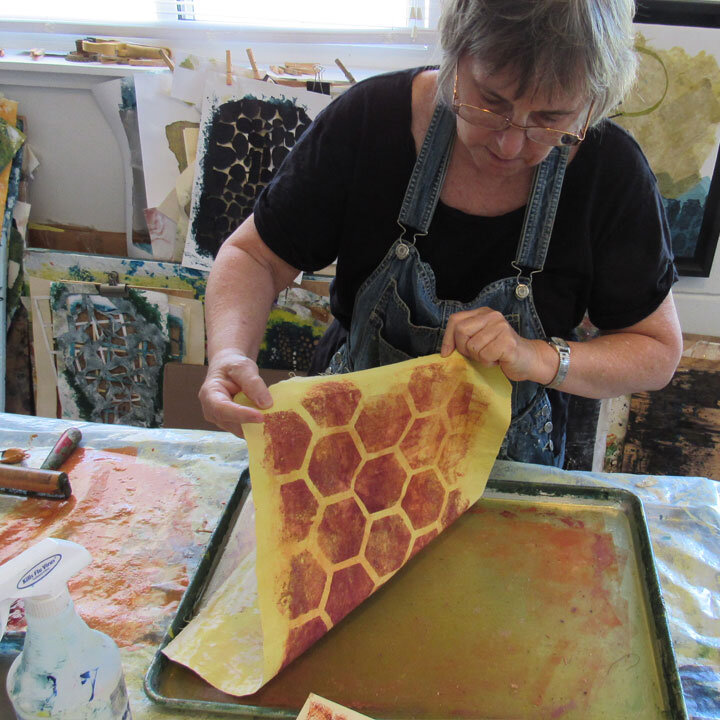
On my work table.. a pile of fabric printed as monotypes using honeycomb stencil
This week, I became inspired to add a pattern of honeycomb to the environment I’ve created so far, which is a mix of printed fabric and photo transfers. The honeycomb will become a way to connect the different components — both visually and conceptually.

In progress… how the honeycomb will relate visually to the little girl.
Bees are busy. They all have assigned tasks. But they do not vary from those expectations. So, by incorporating them into this scene, I hope to clarify the question the girls have to figure out. It’s not just “What is life about?” It’s “What is life about and what is my role supposed to be?”
This is the heart of the artwork. It’s what has inspired me to create this piece. I have depicted two girls, sitting in their “here we are being good” poses, surrounded by an environment that is recognizable but does not make sense. They are in it. And they have to make sense of it. It is my hope that the size and complexity of the work — its layers of patterns and photos — will draw the viewer into this process too.
So, to get to the concept, I’ve now been immersed for a few days in the technical image-making part of creating the honeycomb pattern.
First, I hand cut two stencils: same pattern, but in two sizes.
Then I did some printing.

Working with hand-printed monotypes, I have four variables per pattern size: 1. Positive image on opaque fabric (muslin). This is where the ink is printed in the “holes” of the cut stencil. 2. Negative image (printing from the ghost outline on the plate – what’s left after printing 1.) on opaque muslin. 3. Positive image on sheer fabric. 4. Negative image on sheer fabric.
Then, those four variables repeat on the second stencil size.

Using the small stencil I cut. Positive shape prints.

Using the same small stencil. This is the ghost print, showing the linear outline of the pattern.
The result is that, with very little color variation I have some patterns with a lot of variety but which are also unified.
Then, as I collaged (that’s what I started this morning) I took a few of the individual cells and cut out the printed portion, replacing it with a different fabric, some of the pieces I initially created for the background of this work.

Collaging different fabric patterns into the printed honeycomb.
Today, all of the pieces I want to collage in place are held in place by masking tape so I get an overall view of placement and pattern across the panels. Next… I glue!
In case you’d like to see other works… I have been interested in the concept of a girl’s journey for several years and have addressed it in different ways. Here are two of my personal favorites on my website. I hope you will enjoy looking at them.
Thank you for reading.
I always enjoy questions and comments.
--Bobbi
bobbi@bobbibaughstudio.com
BLOG POSTS: If you would enjoy receiving blog posts by e-mail, please subscribe here: I post blogs once a week. BLOGS-BY-EMAIL
NEWSLETTER: If you enjoy more detailed behind-the-scenes stories, as well as FIRST LOOKS at new works and members-only discounts, I hope you’ll become a Studio Insider. You’ll hear from me about once a month. NEWSLETTER