I enjoy time in the studio alone. Thinking about artmaking. Practicing. Experimenting.
And I enjoy time with my local art group, doing some of those same things, but in a the context of camaraderie, listening to the shared words of fellow artmakers as they work on their own projects, talking and interacting as I go.
And this week I’ve had a chance for both of those things.
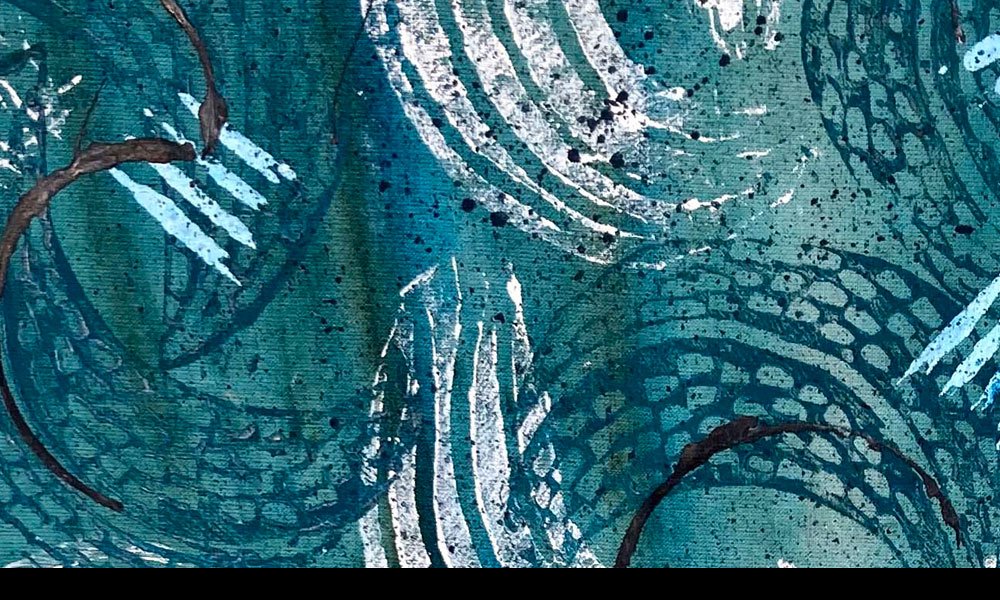
The subject is relief printing experiments.
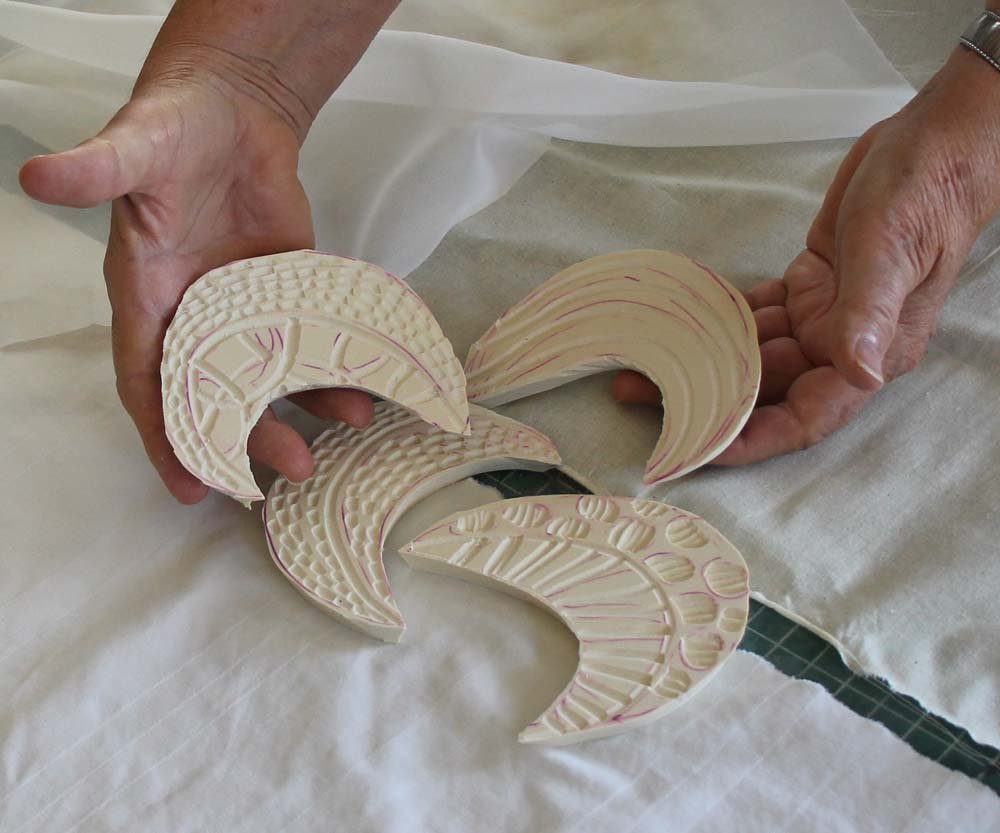
Quick definition: relief printing is a form of printmaking in which the plate has raised areas – places that stick up – to receive the ink (in my case, acrylic paint) and areas that are recessed that don’t receive the ink. Think of a rubber stamp and a stamp pad. Or, for printmakers, linoleum blocks, woodcuts or, as I’ve been using, carved pseudo-linoleum blocks of EZ-cut rubber.
Quick philosophical observation: I find it pleasing and meaningful to use simple methods and limited supplies to create fabric and then artwork that is as layered and interesting as I can make it. Relief printing with acrylics is a fit for this way of working.
The basics: Paint will get rolled across the plate and the plate will be pressed against whatever you are printing. (A printmaker making works on paper most likely uses a press, not hand printing.) In this week’s experiments I am printing fabric yardage — printed by hand instead of a press — to be incorporated into future art quilt projects.
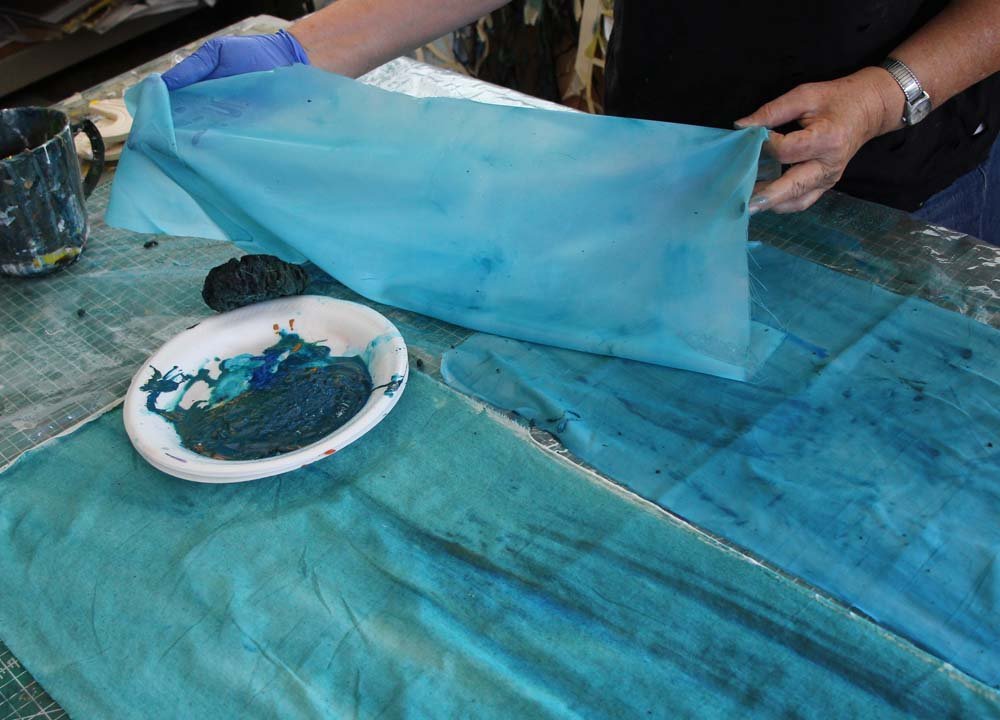
Beginning. In the picture above I’ve painted several different kinds of fabrics with a wet wash of acrylic for all-over teal blue. I used cotton muslin (Opaque, a little toothy,) a bedsheet (opaque, but a smoother finish,) and some sheer polyester (semi-transparent, very lightweight.) The same plate or image pressed onto each of these fabrics will create a slightly different effect. Further along in this post I’ll show some samples in brown and red hues, and I used a mix of fabrics there too.
My alone-in-the-studio experiments were, I must confess, a little slap-dash. I was really trying to test the blocks I’d carved and see if I liked the patterns. I did.

But I was not diligent in the prep and application of the paint on the carved plate and some of the printed yardage was uneven and globby in ways I did not like.
To prepare for my Saturday work with my art group, I had to gather all my supplies to schlep with me. I used this opportunity to prepare better.
I cleaned my brayer. (It had been embarrassingly covered with old acrylic and did not spread an even coat onto the plate.)
I created a good padded work surface. I just folded a beach towel over a piece of Styrofoam, then wrapped it in plastic and taped it together well.
I cut wood backers for the blocks I had carved. It is not essential to do this, but I felt it was well worth the time. they are much easier to handle, less messy in production, and provide a good firm surface to press down for printing by hand.

And I thought through some of the variables: Mix two designs on one piece of fabric. Same design, different colors. Overall designs with broad shapes, overprint with smaller or linear shapes.
Look ahead to the final art quilts I have in mind to create yardage that may fit the envisioned palette.
Have trays and Tupperware containers ready to soak and clean carved stamps and the brayer as printing gets into full wing. As an added challenge, my group meets in an environmentally-conscious facility that does not want acrylics or wash water dumped out in the sinks or in the grass. I had to bring a gallon bucket with lid to cart my waste home with me to dispose. (It made me use water wisely!)
Eventually, I had all my ducks in a row. Here is what I’ve created so far. Several of these are still only partially done. I’ll take a look in the next few days and see what layers I want to add.


One last reminder: Methods can be mixed and matched. If you are inspired to try some block carving and printing, remember that this can be used along with other methods you like: digital printing, stencils, drawing,collage…. just keep thinking things up!
For all the artmakers: Happy creating
For all the art lovers: Happy appreciating
Thank you for reading. I always enjoy questions and comments.
--Bobbi
How I keep in touch:
BLOG POSTS - once a week: Mostly about what I am creating in the studio. If you would enjoy receiving blog posts by e-mail, please subscribe here: I post and send by e-mail each Sunday evening. BLOGS-BY-EMAIL
NEWSLETTER – about once a month: Mostly news of exhibits and my way of introducing new work. You’ll get FIRST LOOKS at new artwork and members-only discounts. You’ll hear from me about once a month. NEWSLETTER