I began a new project this morning that will require at least one new stencil to add to my image vocabulary.
I will be featuring trees in motion. So, I am cutting a windswept tree shape.
I use stencils a lot – both for fabric surface design and for paper mixed media collages. They are a staple in my image toolbox. It pleases me to be able to create varied and interesting images with very simple methods.
Starting at the beginning today gave me a chance to talk some more about using stencils.

Step One - Cut the stencil. (Actually, this is step two. Step one was figuring out what image I wanted and what size. Then I drew it on cards stock: several manila folders taped together.) If I am creating a stencil I think I can use multiple times, I invest the time into making it strong. Here I am coating the card stock with matte medium. Do both sides. You could also use gel medium. This creates an acrylic surface to the card stock so it won’t fall apart when you use it.
There are other material options:
Tyvek. I cut up tyvek envelopes. (VERY strong. Very thin – good for not leaving a paint drip edge when painting. But very flimsy. No good for all shapes.)
Freezer paper – can be ironed onto the fabric and stays well. You can’t use one of these forever, but you can probably iron it down a few times. Also flimsy. Not good for complex shapes.
Plastic – Strong. No need to coat them. But some plastics are hard to cut. Washable.
Commercial Stencils – There are a lot of tempting stencils available at various art supply outlets. I choose to use only original images that I draw and cut myself. But you might enjoy using ones already made.
Step Two – Cutting Interior Spaces and creating positive-negative
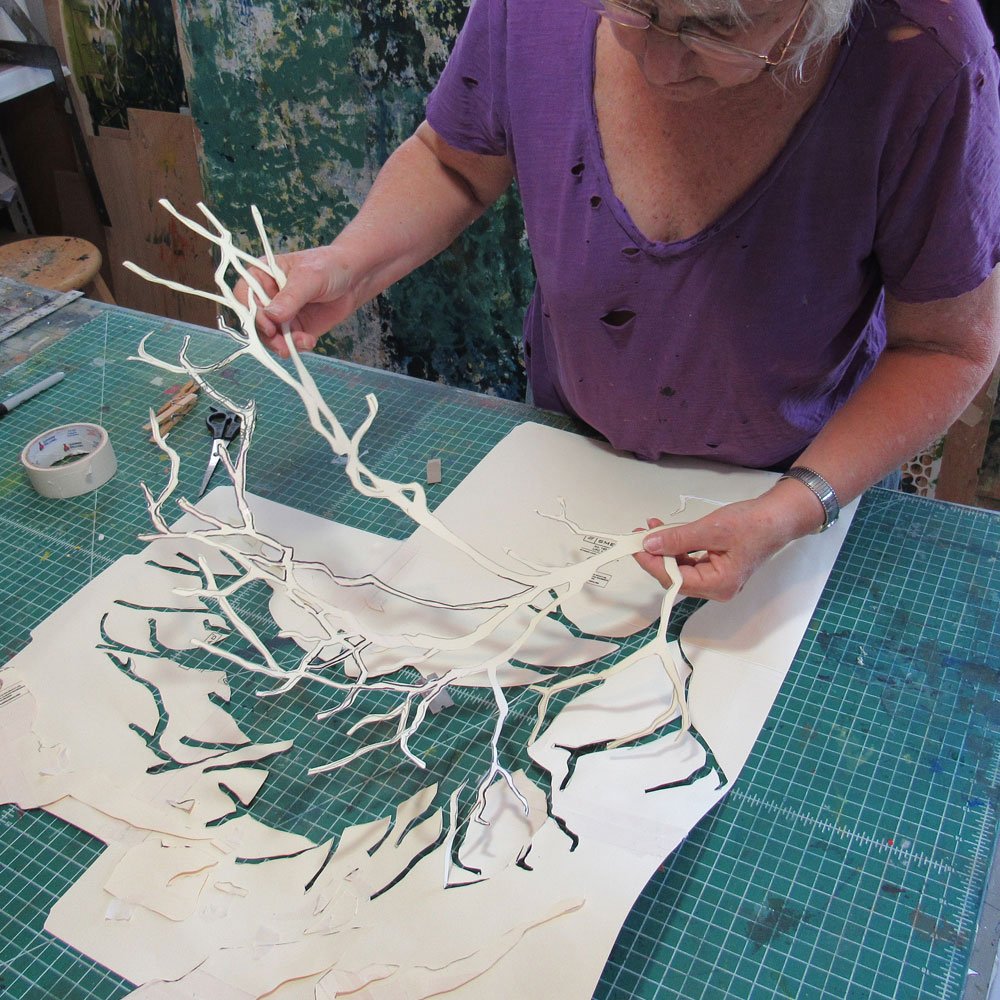
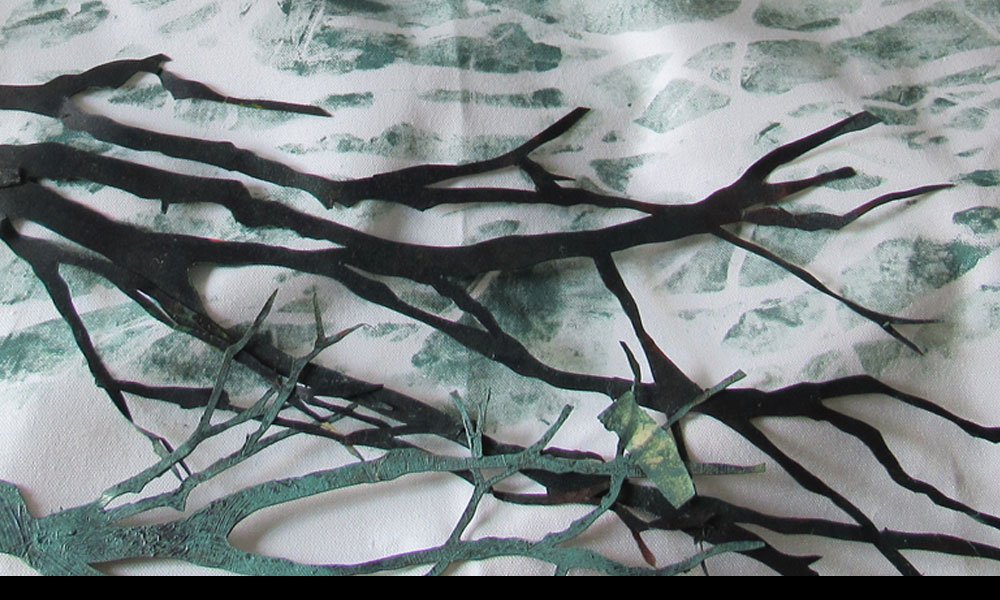
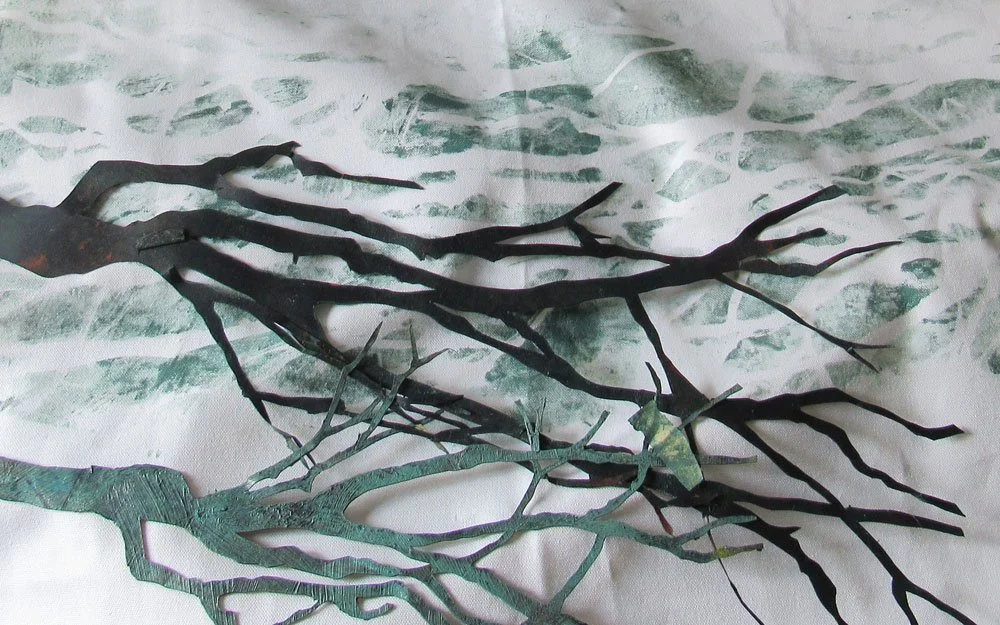
Most stencils that you cut actually create two pieces to work with: one is the positive. One is the negative. In this case, the actual tree I’ve created is the positive. When I lay it on fabric or paper, it will block out the background and I will print around its shape. When I use the negative (the hole in the card stock is the shape of the tree) it will be a way to print the shape of the tree itself.
Interior Spaces (Donut Holes)
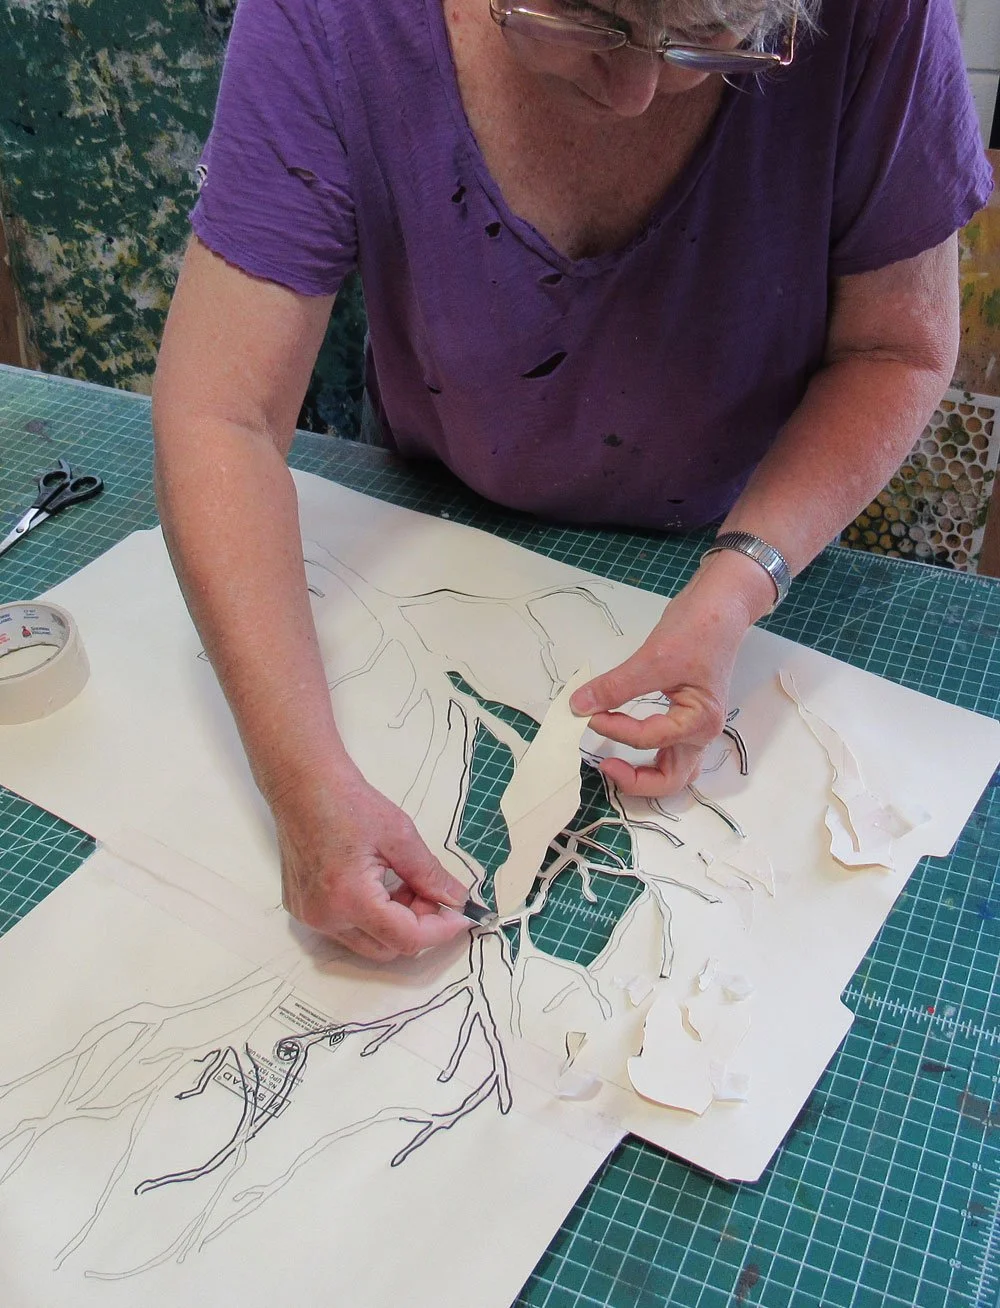
A complex shape like a tree will have interior pieces that fall out when you cut away the parts around it. To make the negative shape usable, you’ll need to put these back into place a build little bridges to hold them there. I use thin strips of masking tape, adhered on both sides of the stencil.
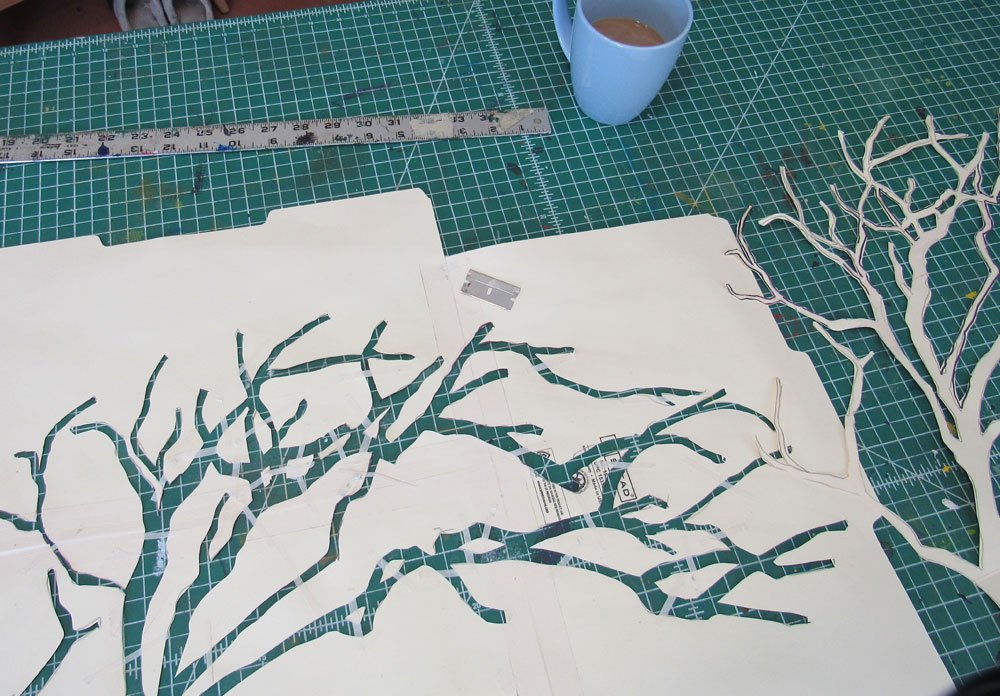
Here are the pieces I created Saturday morning. on the left is the negative, with the donut holes in place and reinforcing bridges applied. On the right is the positive shape of the tree.
PRINTING WITH STENCILS
I pulled some tree shapes I already had to print background shapes of tree forms. These will be the background layer, as I build more color and texture in subsequent layers.
FAMILIES OF SHAPES

As you begin to collect a repertoire of shapes you like to use, you will probably see patterns emerging. I use a lot of background patterns that are based on circles. These can look like bubbles, or rocks, or honeycomb, or just geometric shapes depending on color and context.

Here is a closeup of a quilt-in progress that incorporates a window shape in two sizes. The smaller size was used as part of the surface design in the fabric background. I laid down the positive shape of the window then loosely painted the teal over it. The background gold tones showed through to depict the window. For the big window. I used a large version of the window to make a cutting template. This dark blue window is cut out of painted sheer fabric, collaged into place, then stitched.
The secret to creating images that please you and that you find interesting is to spend time experimenting. There are lots of variables in the materials you choose, the colors, and how you apply the paint. The joy of discovery is in the practicing!
The galleries on my website have many artwork samples that were created with stencils (in addition to other methods.). I invite you to take a leisurely stroll. GALLERIES
For all the artmakers: Happy creating
For all the art lovers: Happy appreciating
Thank you for reading. I always enjoy questions and comments.
--Bobbi
How I keep in touch:
BLOG POSTS - once a week: Mostly about what I am creating in the studio. If you would enjoy receiving blog posts by e-mail, please subscribe here: I post and send by e-mail each Sunday evening. BLOGS-BY-EMAIL
NEWSLETTER – about once a month: Mostly news of exhibits and my way of introducing new work. You’ll get FIRST LOOKS at new artwork and members-only discounts. You’ll hear from me about once a month. NEWSLETTER